UPDATE 2015-02-01: Additional tips from Kathryn Turner added below!
Collecting high-quality DNA is the first, critical step in any genetic study. Working with fresh material is usually the best option. Second choice would go to leaves that were frozen immediately after collection. However, this is difficult to manage on extended field trips. This makes silica gel the preservative of choice for most botanists working away from the greenhouse. In this post I’ll provide a few pointers for how best to use it.
The problem
DNA is actually a relatively stable molecule. While it should be stored in the freezer, extracted DNA accidentally left at room temperature over a weekend is unlikely to degrade.
However, in the normal course of cell functioning, DNA is constantly being split apart, translated and otherwise manipulated. In living tissue, this is carefully regulated by enyzmes, within different membrane-bounded areas of the cell. When the tissues are damaged, as when a leaf is collected, the integrity of the cell is compromised, and the DNA is exposed to a slurry of enzymes and other chemicals that will quickly break it down beyond use to a biologist.
There are two ways to prevent this breakdown: freezing and desiccation. Given that freezing is rarely an option in the field, that leaves drying. If we use a plant press, it can take a week or more for the leaves to dry completely. This is too slow to preserve the DNA. Drying a press over a heater of some kind is better, and DNA can be extracted from well-dried herbarium specimens for some applications.
For particularly sensitive methods, such as AFLPs or microsatellites, or if you need higher quantities of intact DNA, a better method is necessary. That’s where silica gel comes in. It’s cheap, easy to handle, and most important can dry a leaf sample in 12-24 hours, fast enough to preserve enough high-quality DNA for most applications.
What is silica gel?
Silica gel is a white, orange or blue crystal, packaged as dust-sized powder or larger beads up to 5 mm across. The crystals have a high capacity for absorbing moisture. We most frequently encounter silica gel when we buy electronics — the little packets in the packages with the “do not eat” warnings are silica gel. If one of the packets gets split when you open the package, you’ll see the actual crystals rolling around in the box.
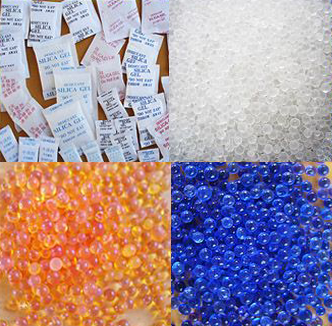
Silica gel can be purchased in “indicating” or “non-indicating” forms. The indicating forms have a dye added to some of the crystals. The dye changes colour as the amount of moisture absorbed by the gel increases. The most frequently used dyes are cobalt chloride, which is blue when dry, changing to pink as it absorbs water; and methyl violet, which is orange when dry, changing to green.
Is it safe?
There are no serious dangers of handling silica gel. However, it may irritate your eyes, lungs or digestive tract (remember not to eat it!). Note, though, that silica in the form of silica gel does not cause silicosis.
There is some risk associated with the indicator dyes added to some silica gels. Cobalt chloride has been classified as a carcinogen in Europe; methyl violet is offered as a safer alternative.
Given these considerations, my preference is to use larger (2-4 mm beads) indicating orange silica gel crystals. The dust size gel may dry slightly faster, but it’s impossible not to inhale it when you handle it. It can take a few days to cough that dust back out. The larger beads are much more pleasant to handle, and I’ve yet to inhale one. The orange coloured beads use the safer methyl violet indicator.
How do you use it?
Let’s work back from our extraction. Most extraction kits use 20 µg of leaf tissue.
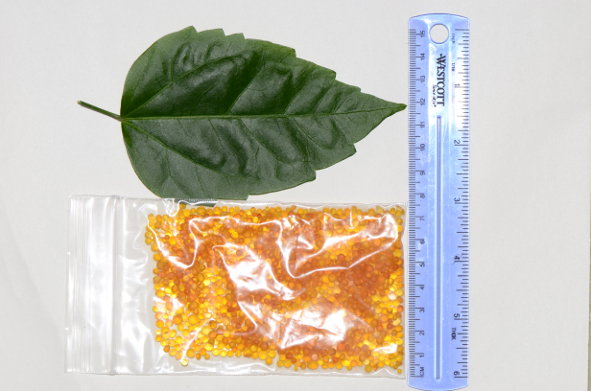
That’s about a 4 cm2. Flow cytometry requires about the same amount of issue, and I like to collect at least enough tissue for two extractions and two flow runs. A single hibiscus leaf provides sufficient tissue.
This leaf weighs in at about 1.3 gm fresh. As a rule, you should have at least 10 times more silica by weight than the tissue you want to dry. I pre-fill my silica bags with 30 gm of crystals, so that should be ok for this leaf. Note that 30 gm = 30-40 ml of crystals; we measure them out by volume, not weight.
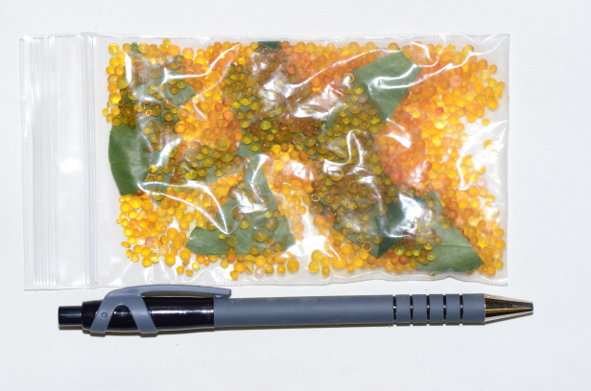
To increase drying speed, rip the leaf up into pieces. Place it in the bag and shake it around, so that the leaf surfaces have good contact with the beads. Avoid getting big clumps of leaves - the inner surfaces won’t dry well. Push the air out of the bag and seal it tight. Throw it inside a second bag for extra safety, label it and place it somewhere safe.
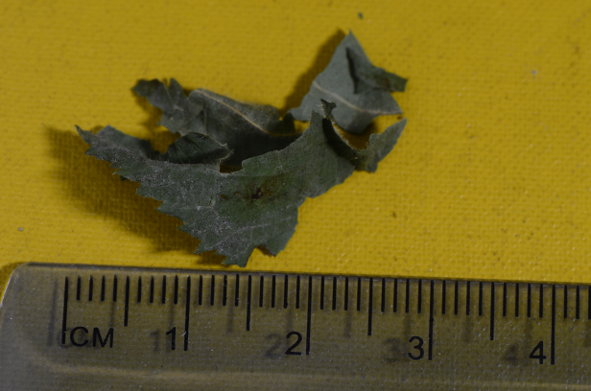
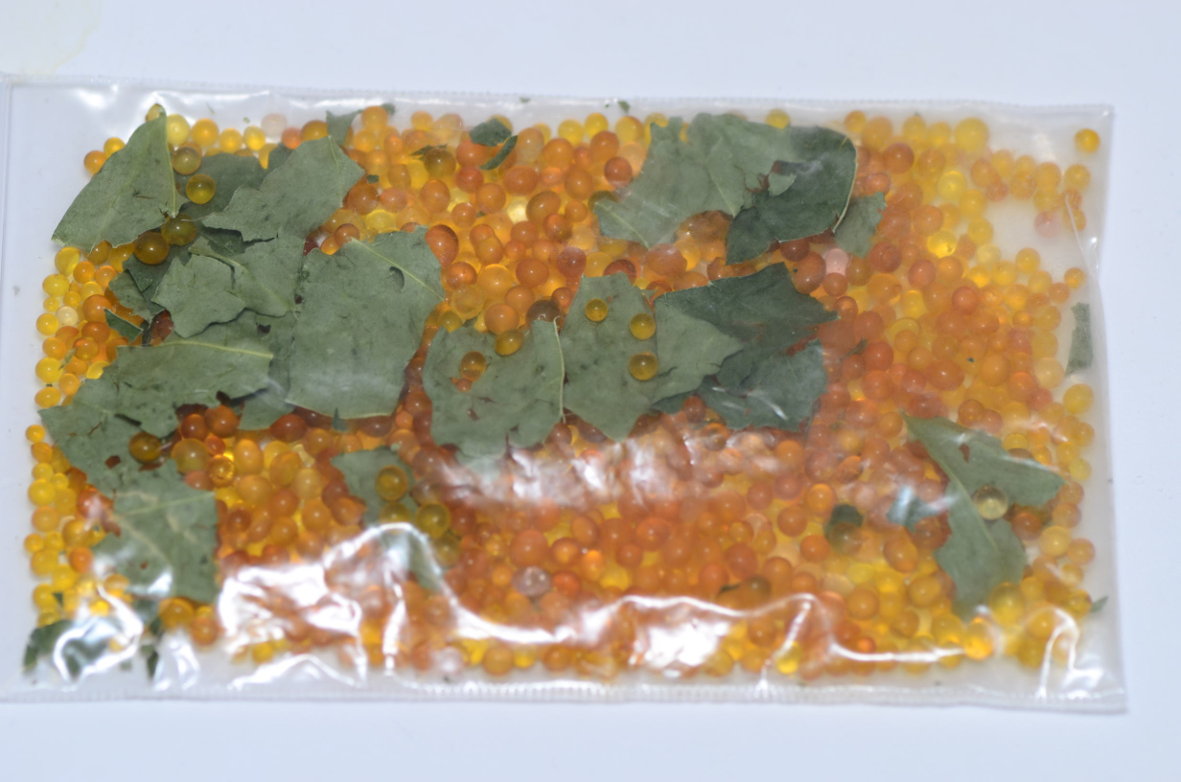
Twelve to twenty-four hours later, your leaf should be completely dry.
How do you know it worked?
A properly dried leaf will snap when you try to bend it. The colour may have faded slightly, but it should still be green. Some of the beads may have shifted colour a little.
Warning signs
If the leaves have turned brown, or many of the indicator beads have shifted colour, you should use more beads or less tissue.
Reusing crystals
After the tissue is dried, you can remove most of the crystals. If you used 30 gm to dry your tissues, 10 gm should be enough to keep it dry.
You can reuse the crystals, if you’re careful, and depending on the tissue you’re collecting. Carex leaves are pretty tough, and it’s not hard to pour off the crystals leaving all the leaves in the bag. On the other hand, Rubus leaves break into tiny pieces, and the risk of contamination in reused crystals is too great to bother with it.
UPDATE: A tip from Kathryn Turner to keep your leaf bits from contaminating the silica crystals:
@sedgeboy A trick to avoid having to sift leaf bits out of the silica is to put leaf tissue into paper envelopes, then put those on silica
— Dr. Kathryn G. Turner (@KTInvasion) February 1, 2015
Kathryn’s approach is to use one large tub or bag of silica, and place an the samples from entire population (each in a paper envelope) into it. This would allow you to leave the silica in the car, and just carry envelopes into the field. A short time (up to a few hours) between collection and storage doesn’t seem to impact tissue quality, at least for sedges. My supervisor now prefers to wait until the evening to put her Carex leaf samples on silica.
If you are reusing crystals, or if you have purchased crystals that were already showing their “wet” colour, you can recharge them. The easiest way is to bake them in a pan at 200°F until the colour changes back. This usually takes a couple of hours, longer if you’re using deep pans. If you’re in a bind, you can pan-fry them over a camp stove — keep the pan well above the flame, and keep them moving. This is, however, a sub-optimal way to spend your field time!
Where to get them
Craft stores such as Michael’s often carry silica gel, which is used to make dried flower arrangements. This is usually the white dust with cobalt chloride variety though. When I set up my current lab, I bought a bulk quantity of orange indicating beads from www.silicalgelpackates.com.
References
Chase, M. W. and Hills, H. H. 1991. Silica gel: an ideal material for field preservation of leaf samples for DNA studies. Taxon: 2015–220.
