This is part four in my series of Emacs tutorials aimed at bioinformatics (and other scientific analysis) workflows. See the rest on my tutorials page.
Emacs provides full support for editing RMarkdown documents. RMarkdown has extensive documentation, both at the previous RStudio link, and several free online books by Xie et al. (notably R Markdown: The Definitive Guide, but also several others listed on Yihui Xie’s Bookdown page).
Most of these references assume you are using the RStudio development environment. The purpose of this tutorial is to get you started editing RMarkdown documents in Emacs.
Installation
Prerequisites
You need to have R installed, of course. You will also need Pandoc in order to take full advantage of all the output options available. If you want to create PDF documents, you’ll need LaTeX as well.
All three of these programs are provided in the package repositories for most major Linux distributions. See the links above for instructions for installing on Windows or Apple computers.
You will also need to install the rmarkdown R package. You can do this
from within R via:
install.packages("rmarkdown")This will also install the other R requirements, notably the knitr package.
The bookdown package provides some more advanced citation features. I won’t discuss them in this short tutorial, but in order to use them you need to install that package too:
install.packages("bookdown")Emacs Packages
We need a few additional Emacs packages to comfortably edit RMarkdown documents. These are:
- Markdown Mode
The major mode for editing files in markdown format. This tutorial uses features added after 6 January 2021.
- ESS
The collection of modes for editing R code and interacting with the R program.
- poly-R (Polymode)
polymodeis a ‘glue’ mode. Thepoly-Rvariant extends markdown mode to allow us to edit embedded code snippets in R (and other languages too)
(poly-R also supports files in .Rnw format, which mix LaTeX and R
code. We won’t cover that here)
polymode started out as a collection of modes to support files with
different combinations of languages. As it has grown, many of those
different modes have been split out into separate packages. When we
install poly-R, it will automatically install the core of the
polymode system for us.
This tutorial uses features added after 29 September 2021.
As in previous tutorials, (see my blog or the demo on Youtube), we can install all three of these packages from MELPA.
Once we have the required packages installed, no further configuration
should be necessary. When we next open a file with a .Rmd extension,
Emacs will know to use the poly-markdown+R-mode for these files. If
everything is working properly, you’ll see Markdown PM-Rmd in the
modeline at the bottom of the window for these files, and Markdown,
RMarkdown, and Polymode menus at the top of Emacs frame.
Configuration Note
Depending on how you have installed poly-R, it may be loaded
automatically, or you might need to load it yourself in your config. If it
isn’t loaded automatically, you might see errors like (void-function poly-gfm+r-mode) when you try to open an Rmarkdown file.
You can fix this with by adding the following line to your Emacs config. The location isn’t critical, but it’s probably most convenient to put it at the beginning of any configuration you use for ESS/R/Markdown.
(require 'poly-R)Github Flavoured Markdown and Code Blocks
Markdown mode supports several different options for code blocks. To take
full advantage of the RMarkdown support provided by the rmarkdown R
package, we need to use fenced code blocks, along with language strings
wrapped in braces1. I’ll explain this in more detail below.
This variant of markdown is referred to as “Github Flavoured Markdown”, and
the markdown-mode package provides gfm-mode with a few extra features
particular to it. Turning on gfm-mode for Rmd files requires the
following line in your Emacs configuration to turn it on2:
;; associate the new polymode to Rmd files:
(add-to-list 'auto-mode-alist
             '("\\.[rR]md\\'" . poly-gfm+r-mode))
You will also need the following line, if you want gfm-mode to
automatically insert braces for code blocks (described below):
;; uses braces around code block language strings:
(setq markdown-code-block-braces t)
This will switch you from using poly-markdown+R-mode to
poly-gfm+r-mode, which shows up in your mode bar as “PM-Rmd(gfm)”. It’s
nearly similar, the main differences being the support for fenced code
blocks.
RMarkdown
Editing Markdown
Markdown syntax is designed to be easily entered by hand, which means if you’re already familiar with the format you can just get going. Markdown mode will provide you with syntax highlighing automatically:
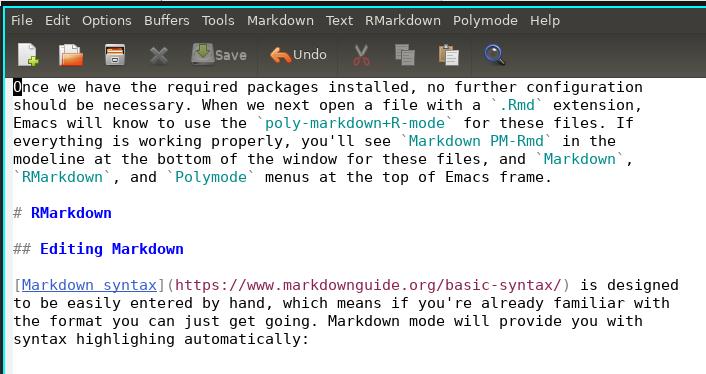
A Markdown Mode buffer showing syntax highlighting
Of course, there are lots of shortcuts available. You can explore the most
frequently used in the Markdown menu. I’ll summarize some of the main
ones here to get you started.
Headings
Markdown has two different kinds of headings. The “Atx” style uses #
symbols at the beginning of the heading, and, optionally, also at the end:
# Heading Level 1

## Heading Level 2 ##
You can insert these headings with the following commands:
C-c C-s hinsert a heading at the same level as the previous heading.
If the region is active, the contents of the region will be used as the
header text. If point is on a line with text, the line will be
converted into a header. Otherwise, an empty header will be created.
C-c C-s {1-9}insert a heading at the specified level. i.e.,
C-c C-s 3inserts a third-level heading.regionandpointcan be used to set the heading text as for the previous.
You can manipulate headings with the following commands:
C-c <up>andC-c <down>move a heading and all of its content up or down in the document.
ie., turn this:

Markdown headings in original order
into this:
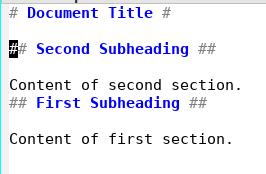
Markdown headings with subheading 2 ahead of subheading 1
C-c <left>andC-c <right>promote or demote a heading.
i.e., turn this:
Markdown headings in hierarchy
into this (and vice versa):
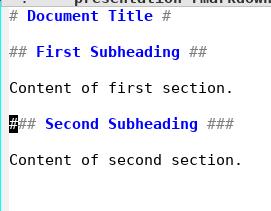
Markdown with subheading 2 demoted
If you prefer asymmetric headings (i.e., with # symbols only at the
beginning of the line), you can configue this by setting the variable
markdown-asymmetric-header to t:
;; set in your ~/.emacs or ~/.emacs.d/init.el
(setq markdown-asymmetric-header t)
Alternatively, you can do this via M-x customize-variable markdown-asymmetric-header.
Markdown mode also supports the setext style headings:
Heading Level 1
===============

Heading Level 2
---------------
Only two levels are supported, which you can insert automatically with the
commands C-c C-s ! (level 1) and C-c C-s @ (level 2).
Heading Visibility
You can hide and show different sections in documents by pressing the
<TAB> key with point on a heading. For example, with point on the # Installation heading, when I press <TAB> I move from this:

Markdown buffer with all sections visible
to this:

Markdown buffer with the Installation section hidden
This doesn’t change any of the text in your file, it only hides the parts
you don’t want to see. Repeatedly pressing the <TAB> key will toggle
through the various levels of hiding and showing.
If you want to toggle all the headings at once, Shift-<TAB> will toggle
visibility for all headings at once. You can use this to collapse your
entire document to a table of contents:
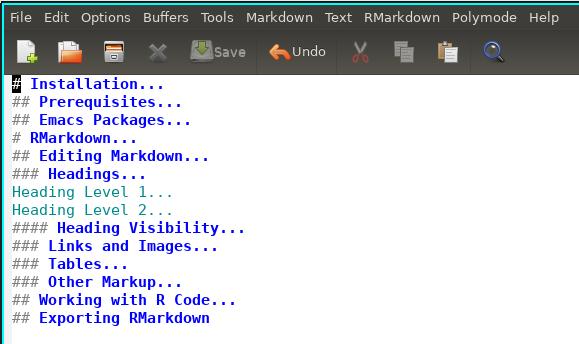
A Markdown buffer with only headings visible
Links and Images
Inserting links is done with C-c C-l. Emacs will first prompt you for the
link URL, followed by the link text, and finally the tooltip text. Only the
URL is required. To open a link from Emacs, use C-c C-o, which will take
you to the webpage in your browser.
Images are handled similarly, and are inserted with C-c <TAB> or C-c C-i. The URL can be a web resource (e.g.,
https://my-images.ca/image1.jpg), or a local file (e.g.,
./images/image1.jpg). The image will appear as:
You can toggle displaying the actual image in the buffer with C-c C-x C-i.
Tables
To insert a new table, use the command C-c C-s t. You will be prompted
for the number of rows and columns, and the alignment you want. When you’re
done, you’ll have a proper markdown table ready to edit:
|   |   |   |   |
|---|---|---|---|
|   |   |   |   |
|   |   |   |   |
|   |   |   |   |
With point in any of the cells, you can <TAB> into the next cell, or
Shift-<TAB> into the previous cell. Each time you hit tab the cells will
resize automatically to accomodate your text.
Additional commands are available for moving, adding and deleting rows and
columns; see the Markdown -> Tables menu the options.
Other Markup
Markdown mode also provides shortcuts for other markup elements. See the
Markdown menu for some of the options. I find most of the basics (bold,
emphasis, unordered lists) are just as fast to type by hand as they are to
insert using shortcuts.
Working with R Code
rmarkdown uses fenced code blocks with braces around the language string. i.e.,:
    ```{R code-block-example}
    ## R code goes here!
    1 + 1
    ```
If you’ve set up gfm-mode as described above, you can create one of these
code blocks with the command markdown-insert-gfm-code-block, bound to
C-c C-s C by default. Alternatively, simply entering three “`” characters
at the beginning of a line will call the function for you3. Either way,
you’ll be prompted for the language of the code block (which will be R most
of the time, but you can use others!). You can also add a label for the
code block at the prompt, and any additional options you want to use for
the chunk. You can also add options later if you change your mind.4
Once you have created a code block, polymode will work its magic. You can
continue to edit the markdown portions of your document, with all the
features of gfm-mode. But when point is in an R code block, you’ll be
editing it in ESS[R] mode. That allows you to use all the features of
that package (see
plantarum.ca for a
quick tutorial/refresher).
Polymode provides some additional conveniences:
Evaluation
polymode-eval-region-or-chunk, bound toM-n vevaluate all code chunks in the active region, or the chunk at point if there is no active region
polymode-eval-buffer, bound toM-n bevaluate all code chunks in the buffer
polymode-eval-buffer-from-beg-to-point/polymode-eval-buffer-from-point-to-end, bound toM-n uorM-n ↑, andM-n dorM-n ↓evaluate all code chunks from the beginning of the buffer to point (
uand↑), or from point to the end of the buffer (dand↓)
Exporting RMarkdown
The most important ‘convenience’ of polymode is that it connects Emacs to
the programs used to export RMarkdown files to presentation formats (i.e.,
pdf, html, slides). The main function you need for this is
polymode-export, bound to M-n e.
The first time you run this, you’ll be asked which exporter you would like
to use. There are two choices, markdown and markdown-ess. markdown
means polymode will start a new, self-contained R process and compile
your file there. When compilation is finished, the process will be closed.
markdown-ess will use an existing R process, or start a new one if there
isn’t an active process available. When compilation is complete, the R
process remains active. This allows you to check the values of various
objects interactively. This can be useful as you develop a new script.
RMarkdown files can be compiled to produce a variety of output formats. You
will be prompted to select which one you want the first time you run the
exporter. polymode remembers this setting, so you don’t get prompted a
second time. If you want to switch, say from pdf output to html, you can
reset the target via C-u M-n e.